Showing posts with label yeast breads. Show all posts

Saturday, January 7, 2017

Recipe: Vinegar Bread a Step Up From Regular White Bread!


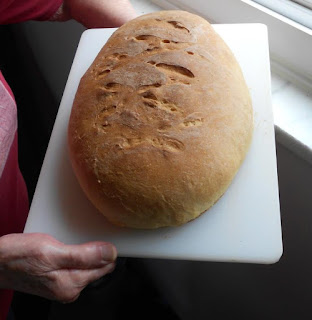
Vinegar Bread loaf.jpeg
This is a delicious white yeast bread that keeps well.


This is a really nice white bread with the addition of vinegar that produces a delicious old world flavor.  This bread stays fresh, but it won’t last long because your family will devour it!

Saturday, August 29, 2015

Recipe: Try My Cheddar Pizza for a Delicious Change of Pace!


Cheddar Pizza side view.jpeg
My Cheddar Pizza is a special treat.


I am a pizza enthusiast.  My love for this sauced up bread with cheese piled high is well known by all that know me.  Therefore, today I have a delightful twist on traditional pizza with all that tomato sauce and fragrant Italian herbs, oozing with lots of Mozzarella cheese that will take your tastebuds by surprise with my Cheddar Pizza.  

Imagine a thin homemade crust with just enough pizza or spaghetti sauce to moisten over that unbaked dough before loading it up with an avalanche of your favorite Cheddar cheese while finishing off that wonder with some freshly cut slices of Jalapeno peppers.  This may seem foreign and not what you expect, but I assure you that its golden cheesiness is guaranteed to win you over.

I must be truthful with you.  Making a pizza crust at home is the easiest raised dough that you could ever try. The secret of success is following my recipe because it is foolproof. Your biggest obstacle is just making sure not to kill the yeast when you proof it in some hot water with some of the sugar.    

I promise you that once you start making your pizza dough from scratch that you will wonder how you ever put up with that cardboard like crust that you may pick up in your freezer section when shopping. Furthermore, you will save yourself money from the need to buy your pizzas ever again.  

All I say is to give it a try. You will LOVE the delicious results!  


Mary's Cheddar Pizza


Cheddar Pizza lengthwise.jpeg
The taste of my Cheddar Pizza is yum, yum, good!


Pizza Dough:

1 cup of water
2-1/2 cups of flour
2 tablespoons of canola oil
1 teaspoon of dry yeast
1 teaspoon of salt
1 tablespoon of sugar


Cheddar Topping:

3-1/2 cups of grated Cheddar Cheese
3 tablespoons  of pizza or spaghetti sauce (or just enough to moisten the dough) 
2 Jalapeno peppers, cleaned and cut into pieces (you can remove the seeds, but I leave them in for an extra nip)


To Make the Dough:

Add half the sugar to your warm water, not hot water, stir trying to dissolve the yeast and let it sit in your mixing bowl until the yeast starts bubbling.  When it has some foaming action, you're ready to add the dry ingredients.

Add the flour a little at a time along with the remaining sugar, oil, and salt.  Stir with a wooden spoon until the dough is no longer sticky.  You want a soft, pliable ball.

The weather can influence the feel of your dough.  Some days it may be too humid for example and you may need to add more flour or even less, depending on how sticky that ball feels on your fingers.  Don’t be afraid of adding a bit more flour or even using less if that dough no longer feels sticky.

Let your dough rest and grow, covered for at least 1 hour to 1-1/2 hours.

After that time, the dough should have grown slightly.  Take that dough and put it in your greased baking pan and stretch to fit.  (For this recipe, I used a large round 12-inch size  pizza pan).

Top with just enough of the pizza or spaghetti sauce to moisten the dough.  You don’t want the same amount of sauce as you would a traditional pizza.

Then load up with all that grated Cheddar Cheese (you can even add more, if you like) and your peppers.

Bake in a 400-degree oven for about 15 minutes or until the bottom crust become slightly brown.

ENJOY!

Sunday, June 3, 2012

Reward Yourself With My Bakery-Style Orange Sweet Rolls!

The next time you buy those thick-skinned navel oranges, you might want to clean off the skins and pull out your grater.  Using the fine side, you should grate that aromatic orange essence for the orange-sugar topping of my delicate textured raised sweet rolls. 

Unlike typical raised dough that you need to grow first before shaping, this recipe is assembled immediately.

Once you shape your little balls, you will dip them into a tablespoon of the melted margarine and then roll them in the orange-sugar topping mix before placing them on your baking tray.  Make them as small or large as you like.  However, give them enough room on your greased round cake pans to grow because they do swell up. 

Cover and allow them to grow about an hour before baking. 

As these rolls bake, your house will smell so delicious with enticing aromas of orange and bread baking  that soon you will notice the family migrating toward the kitchen from out of nowhere to find out when they will be coming out of the oven.
 
My Bakery-Style Orange Sweet Rolls

1-3/4 cups of sugar
1/4 cup of finely grated orange peel
5-1/2 to 6-1/2 cups of sifted flour
1 teaspoon of salt
1 teaspoon of vanilla extract
3 tablespoon of active dry yeast
1/2 cup of canola oil
1 cup of warm water (hotter than lukewarm but not scalding)
3 eggs
1 tablespoon of melted margarine (not spread)
1 teaspoon of sugar


Orange-Sugar Topping:

Mix the grated orange peel with the one cup of sugar.  Set aside. 
Melt one tablespoon of the margarine in a saucepan.  Set aside also.

Sweet Raised Dough:

Test the temperature of the water for the yeast on your wrist.  Make sure it is very warm water, but hot.  Add your teaspoon of sugar to the water and the three tablespoons of yeast.  The sugar will feed the yeast and speeds the growing process along.

Pour the yeast water mixture into a larger mixing bowl and add 1-1/4 cups of flour, 3/4 cup of sugar, salt, and vanilla.  Beat with your electric mixer for about a minute or two until well combined before adding your eggs, one at a time, beating well after each. 

Add 1/4 cup more of flour and beat thoroughly before gradually adding more flour until you form a soft dough.

Knead this on a floured surface or the lazy way, which also works in the same mixing bowl until the dough is smooth and elastic. 

Divide the dough into three equal parts.  Divide one part into eight pieces of the same size.  Form each piece into a smooth ball and dip into the melted margarine and dunk into the topping mixture.  Cluster in a greased 8" round cake pan or any greased baking pan you desire, depending on the size.  The process is the same: dip and dunk.

Cover your finished rolls and let them grow for about an hour before baking at 350 degree oven for about 20 minutes-25 minutes (depending on your oven and size of your rolls).


Friday, March 23, 2012

Bring Them to the Table With My Feather Light Dinner Rolls Recipe!

Feather Light dinner rolls.jpeg
My Feather Light Dinner Rolls are delectable!


I once had a mailman that said my house had the best aromas on the street.  He even invited himself once to sample what I was baking because he couldn't resist that tempting smell escaping through my open screen door.   That particular summer day I happened to be baking my  incredibly light dinner rolls recipe.

Although these are a bit of extra work to roll and shape than just loaves of bread or buns, I do like to make them on occasion.  However, I warn you these are much too delicious to make too often unless you possess fantastic willpower.  Otherwise, you just might land up eating more than you intended!

My Feather Light Dinner Rolls

3 to 4 cups of sifted all-purpose flour
2 tablespoons of sugar
1 teaspoon of salt
1 tablespoon or package of dry yeast
1/2 cup of very warm water (not hot) 
1/2 cup of milk
1/2 cup of canola oil or margarine (not spread)
1 egg

Test the temperature of your water on your wrist so it's very warm, (but not hot) as you would do for a baby bottle.  Add a tablespoon of the sugar to that water along with yeast.  By doing so, you will help speed along the yeast because it will start bubbling sooner.

Heat your milk and oil or margarine and warm.  (Be careful that the liquid is not too hot in temperature because it will ruin the flour with lumps.  If what you're heating gets to hot be sure to allow it time to cool first.)

In a large mixing bowl, add one cup of flour, salt, remaining one tablespoon of sugar, the egg, and the yeast water.  Beat these ingredients with your electric mixer until thoroughly combined.  Add the warmed milk and flour to dry ingredients in your bowl.  Using a wooden spoon works best at this stage instead of the electric mixer. 

Gradually add more of the flour until the dough becomes soft and doesn't stick to your fingers.

Turn the dough onto a  lightly floured surface and knead until the dough is smooth and pliable.  Shape into a ball and return to your mixing bowl.  Grease the top of the dough and cover with a towel or a lid from one of your pots and set aside in a warm place.  Let this dough grow for about an hour and a half.

Grease two cookie sheets.  Punch your dough down and then turn out onto a floured surface.  Form four balls and roll out each out into a circle about 1/2-inch thick.  Cut each circle into fourths.  Roll each cut piece from the fatter end and place on your sheet.  You should get about 24 small rolls.

Let these shaped rolls grow for at least another hour first before baking at 400 degrees for about 10 minutes or until golden brown.

Sunday, January 9, 2011

My Easy Bread Recipe for the Food Processor

food-processor-breads.jpeg
Making yeast bread in the food processor is easy and less messy.


No smell can outmatch homemade bread baking.  It can fill a kitchen with such a wonderful aroma while you impatiently wait for those loaves to bake to perfection!  So if you love fresh homemade bread but hate the mess, I suggest investing in a food processor. 

My recipe is so easy that I promise it is fool proof even if you never baked yeast bread before.  No more sticky hands and doughy fingers when baking bread if you have this appliance.  All you have to do is follow my directions and measure accurately while your processor does the sloppy work!
food-processor-bread-loaves-cooling.jpeg
Once you taste homemade bread, you will be spoiled for that spongy commercial variety.


Foolproof Food Processor Bread
3/4 cup water
3 tablespoon margarine
2 eggs
1 package active dry yeast
1 tablespoon sugar
1 teaspoon salt
3 cups sifted flour

Heat your water and margarine over low heat until very warm--but not hot. 

Using the knife blade, process yeast, sugar, salt and 1-1/2 cups of your sifted flour for a few seconds to mix.  With the processor running, add the heated margarine mixture in a steady stream through the feed tube until well mixed (about 10 seconds).  Add eggs and process an additional 10 seconds.  Add rest of the flour and continue processing until the dough is smooth and elastic (about 60 to 90 seconds).

Dough will be ready to be shaped into a smooth ball at this stage.  Place in a large greased bowl, greasing the top and covering.  Place in a warm area until doubled in size (about 45 minutes).

Punch down after doubled and shaped into a 9" x 5" loaf pan. 

Cover and let rise again until doubled (about 45 minutes more).

Bake at 375 degrees for about 30-40 minutes or until the loaf sounds hollow when tapped.  This makes one big loaf.