Showing posts with label cakes. Show all posts

Sunday, November 26, 2017

Recipe: My Special Filled Yellow Layer Cake Is Wonderful to Serve Holiday Guests

yellow-cake.jpeg
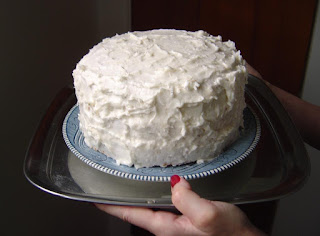
Here is my delicious filled yellow cake made from plain, all-purpose flour.


Besides pumpkin pie for Thanksgiving, I also made a layer cake since some of my guests don’t care for pumpkin.  This is another delicious yellow cake that uses all-purpose flour, but is fine-textured and stays quite moist with a pound cake like taste.  Inside, I added a cooked cream vanilla filling before frosting with a vanilla butter cream icing, sprinkled with shredded coconut flakes.

My recipe may seem more work than usual, but I assure you that it is well worth it.  The cake is easy.  It involves just your basic creaming of butter and sugar before alternating with your dry ingredients and milk.  


yellow-filled-cake-cut.jpeg
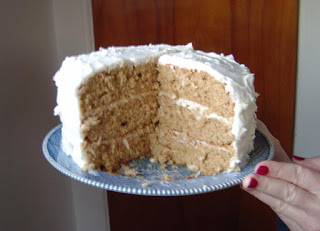
This cake has a tendency to disappear quickly.

What takes up more time is making the filling besides the icing.  However, you can always cheat by buying a ready-made icing to shorten this process, if you prefer to do so.  I just always like to make my own since it is more economical and I know the exact ingredients that we’re eating.


piece-of-yellow-filled-cake.jpeg
I used shredded coconut flakes in my icing.  What else is delicious adding some chopped nuts as well.  


I hope that when you’re in the mood to bake that you’ll give my recipe a try because it does go over very well.  


My Special Filled Yellow Layer Cake


3 cups of flour
2 cups of sugar
1 tablespoon of baking powder, leveled
1-1/2 cups of milk
½ cups or one stick of butter, softened 
2 teaspoons of vanilla extract
2 large eggs

Vanilla Custard Filling:

1/3 cup sugar
2 tablespoons and 1 teaspoon of cornstarch 
1-1/2 cups of milk
2 egg yolks
1 tablespoon of vanilla extract


To Prepare the Cake:

Cream the softened butter that you left out for a while at room temperature with the sugar until light and fluffy.  Beat in the eggs, one at a time to incorporate.

Add the sifted dry ingredients next, beating in a little while alternating with the milk and vanilla until all the ingredients are combined.

Grease and line with wax paper two 9-inch cake pans before pouring the batter into both of them.

Bake in a 350-degree oven for about 25 to 30 minutes, depending on how your oven is regulated or until a cake tester or toothpick comes out clean.

Allow to cool in the pan for about 10 minutes before attempting to remove.


To Prepare the Filling:


Separate the eggs and put the yolks in your pot.  If just take the eggs out of the refrigerator and attempt to separate, this is a bad idea.  To speed up the process, I run them under some warm water first or leave out at room temperature.  

Now mix your cornstarch with the cold milk to make a creamy mixture.  

Add this milk mixture and sugar to the waiting yolks and begin cooking on medium heat until it bubbles and thickens.  Make sure to stir occasionally so it doesn’t burn.

Take off of the heat and add the vanilla.

Allow this cool before filling and icing with your favorite butter cream icing.  

ENJOY!

Saturday, September 9, 2017

Recipe: You Must Try My Devil’s Delight Chocolate Cake If You Love Chocolate!


devil's delight chocolate cake.jpeg
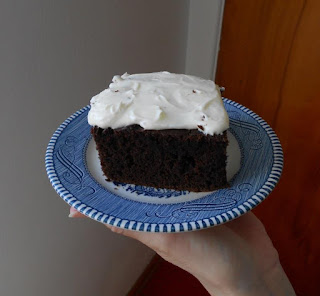
You won't work hard making this extra rich, chocolate cake.


Those that can’t enough chocolate will love this delicious chocolate cake that I want to share.  My Devil’s Delight Chocolate Cake is every chocoholic’s dream with extra chocolate in a moist, big cake.  To play against that deep, rich chocolate flavor, top with your favorite creamy, white frosting, which compliments it so well.  

Another thing that you’ll appreciate about my recipe is that you won’t spend a lot of time working on this cake.  There is a minimum amount of creaming involved,  just basically mixing the dry with the wet ingredients.  

I hope that the next time that you’re in the mood to bake that you’ll print out my recipe and try it at your house!

Saturday, July 29, 2017

Recipe: My Clove Cake Is a Delicious Change of Pace From Ordinary Spice Cake!

piece of clove cake near sofa.jpeg
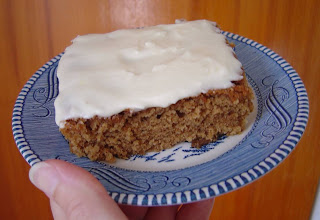
My recipe makes a wonderful sheet cake!


I will not deny it, but I do love my sweets, especially a great cake.  Today, I want a share a really good sort of spice cake recipe that just has cloves and vanilla instead of the usual cinnamon, nutmeg, allspice, and ginger that you might find in typical spice cakes.  This sole spice along with vanilla gives this cake a  beige-brown color as well as a unique flavor not quite like spice cake, but definitely one that you’ll want to make over and over again once you give it a taste.

Topped with your favorite vanilla butter cream frosting, this is a moist cake that also keeps quite well.

Give it a try when you get a chance because I think you’ll love it once you taste it.  


My Clove Cake


1 cup of butter, softened
2 cups of sugar
4 large eggs
3 cups of sifted flour
3 teaspoons of baking powder, leveled
½ teaspoon of salt
1 cup of milk
2 teaspoons of vanilla extract
1 teaspoon of ground cloves


Cream the butter with the sugar until thoroughly mixed.

Add the eggs to the creamed sugar mixture and beat with your electric mixer, one at a time until incorporated.

Next, sift the dry ingredients together and alternate with the milk and vanilla until finishing with the milk and all ingredients are added.

Grease a 13 x 9 x 2-inch baking pan and bake in a 350-degree oven for about  40-45 minutes, depending on how your oven is regulated.  Test with a toothpick, cake tester or slender knife to see if anything sticks.

Cool thoroughly before frosting with your favorite butter cream frosting.

ENJOY!

Saturday, January 21, 2017

Recipe: My Spanish Bar Cake Is Wonderful When You Want Something Easy and Delicious!

piece of Spanish Bar Cake.jpeg
My recipe is easy, tasty, and a moist great keeping fruit and spice cake!


When you want an explosion of flavors in one deeply satisfying cake, then you need to try my Spanish Bar Cake.  This rich, spice moist cake  is loaded with plumped raisins before being finished with your favorite creamy white icing.

Just like my other recipes, this is another easy cake to bake.  Basically, you just measure, boil, sift, and stir the ingredients before depositing in your cake pan and baking.  In fact, you don’t even need to take out your electric mixer.  Instead, you can just stir with your wooden spoon, if you care to.

Saturday, December 19, 2015

Recipe: My Best Spice Layer Cake Is Perfect for Holiday Cheer!

My Best Spice Layer Cake.jpeg

If you truly believe in the spirit of the holiday season, this is the time of year meant not just for giving gifts, but to share goodwill toward all. Whatever you’re doing now as you get into that spirit, I wish you well from my heart and hope all kindness you extend to others is repaid tenfold. 


Today, I wanted to do something special for a relative that has been sick.  I thought what better way to make her Saturday brighter than with my best spice layer cake.  This recipe is easy and makes three moist, light and fragrant nine-inch layers that once topped with your favorite butter cream icing is simply decadent.  


My Best Spice Layer Cake cut.jpeg
My Best Spice Layer Cake disappears once it gets cut.

You may think this cake sounds like a lot of work.  However, you would lose because there is no butter to cream since this recipe uses oil.  Basically, this just involves gathering all your ingredients and mixing just to incorporate everything.  

I do advise using your measuring spoons, especially when using baking powder or baking soda.  It is important for your cake’s success to level those spoons or you can ruin it.  

I hope that you try this recipe because it is given in the true spirit of spreading joy.  


My Best Spice Layer Cake


My Best Spice Layer Cake, unfrosted.jpeg
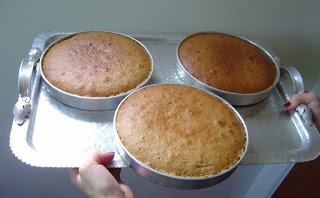
This is what the three layers look like unfrosted.
3 cups of sifted flour
3 teaspoons of baking powder, leveled
1 teaspoon of cinnamon
½ teaspoon of salt
½ teaspoon of ground cloves
½ teaspoon of nutmeg
1/4 teaspoon of ground ginger
1/4 teaspoon of pumpkin pie spice
2/3 cup of canola oil
1-1/2 cups of sugar
3 large eggs
1-1/4 cups of milk
3 tablespoons of molasses (light or dark, whatever you have on hand)
1 teaspoon of vanilla

Mix your oil with sugar and eggs, one at time with your electric mixer.

Sift your dry ingredients together in another mixing bowl and slowly add to the creamed mixture, alternating with the liquids (milk, molasses and vanilla) until all the ingredients are combined.
piece of my best spice layer cake.jpeg
This is what my Best Spice Layer Cake looks like once cut.

Grease and flour or line with wax paper  three nine-inch layer cake pans.

Divide the batter between three cake pans and bake in a 350-degree oven for about 25 minutes or until a cake tester or toothpick comes out clean.

Allow to cool in the pans for about 12 minutes before attempting to remove.  If you try to take them out too soon, you can end up with the cake breaking.

Frost with your favorite butter cream frosting.

ENJOY!

My Best Spice Layer Cake different angle.jpeg
My Best Spice Layer Cake is known to open even the coldest hearts from what I've been told.


Saturday, June 20, 2015

Recipe: Bake My Pineapple Yum Yum Cake and Let the Happiness Begin!

piece of Pineapple Yum Yum Cake.jpeg
This has to be one of the easiest cake recipes that you'll ever find.


Though the name of the snack cake that I want to share with you may sound strange, you should reserve judgment until your first taste.  Once you do, you will understand why we call it Pineapple Yum Yum Cake. However, if you’re expecting a distinct pineapple flavor, then be prepared to experience more of a unique one because you may not find it.

Besides how delicious this cake is with a minimum of ingredients, this recipe also has some other great things going for it.  It is extra easy to throw one together and is cholesterol-free since there is no shortening, butter, margarine or oil involved.  Instead, what keeps this cake moist is the addition of undrained, crushed pineapple.

Furthermore, this cake only requires the simplest topping of grated coconut and brown sugar in place of frosting to complete it.  

I hope you try this cake because I think that you’ll really enjoy it.


Pineapple Yum Yum Cake

Pineapple Yum Yum Cake in pan, uncut.jpeg
Pineapple Yum Yum Cake 

Cake Batter:

2 large eggs
1 small can of crushed pineapple, undrained
2 cups of flour
2 teaspoons of baking soda, leveled
1 cup of sugar

Topping:

½ cup of brown sugar (large or dark)
1/3 cup of grated coconut


Beat the eggs first with your electric mixer or whisk until creamy.

Add the pineapple and just mix through to combine the ingredients.

Sift the flour with the baking soda.  (This is important if you want to avoid those sour spots).

Pour into a greased 9 x 13" baking pan and sprinkle your brown sugar and coconut topping over the batter.

Bake in a 350-degree oven for about 35-40 minutes, depending on how your oven is regulated.  Test with a toothpick, cake tester or slender knife to see if anything sticks.

ENJOY!

Saturday, May 23, 2015

Recipe: My Apple-Carrot Spice Cake Should Be on Your Make This Weekend Treat List!

My Apple-Carrot Spice Cake.jpeg
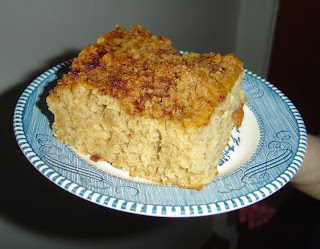
My Apple-Carrot Spice Cake stays fresh and moist for so long.

As you know, I am a lazy cook when it comes to slaving away in the kitchen. Why work so hard when you can make just as delicious of a recipe only with fewer steps?  This is my motto and it holds true like this incredible sheet cake that I have for you today with my Apple-Carrot Spice Cake

This recipe makes a moist cake with a tender crumb that has cooked apple, grated carrot and some yellow raisins mixed along with the spices and just a hint of unsweetened cocoa to nurture that incredible flavor along.  It also has extra protein from the addition of some oat flour to the regular flour along with an unusual Choco-Spice Crumb Topping.

You’ll love the taste, ease of whipping one up, and especially how well this cake stays fresh–that is, if it can last that long.  

Try it this weekend if you get a chance.  You love all those compliments that will roll in once it is served.


My Apple-Carrot Spice Cake


Cake Batter:

½ cup of cooked apples (microwave about two of any variety like Gala that I used)
1 cup of oat flour
1 cup of all-purpose flour
3/4 cup of brown sugar (light or dark, packed)
2 large eggs
1/4 cup of white sugar
1 teaspoon of baking powder, leveled
½ teaspoon of baking soda, leveled
2 teaspoons of unsweetened cocoa 
½ teaspoon of ground nutmeg
½ cup of canola oil
1/4 teaspoon of ground cinnamon
1 tablespoon of milk

Choco-Spice Crumb Topping:

1/4 cup of firmly packed brown sugar (light or dark)
1/4 cup of flour
2 tablespoon of butter
½ teaspoon of ground cinnamon
½ teaspoon of unsweetened cocoa

Rub the ingredients together as you do when making a pastry.  Set aside.


Peel and chop the apples into small pieces before cooking in the microwave for a few minutes or on the stove in some water until they are soft enough to mash.

Place mashed apples in your mixing bowl with the sugars, spices, eggs, oil, and milk before gradually adding the flour sifted with the baking soda and baking powder as you beat to combine.

Pour into a well greased baking pan about 12-3/4" x 9" x 2" and top with the Choco-Spice Crumb mixture. 

Bake in a 350-degree oven for about 25-30 minutes depending on how your oven is regulated.  Test with a toothpick, slender knife or cake tester to determine if it is done.

ENJOY!

Apple-Carrot Spice Cake #2.jpeg
My Apple-Carrot Spice Cake is so simple to make and will please!

Friday, May 15, 2015

Recipe: My Banana Crumb Cake Is Out-Of-This World Delicious!


Piece of Banana Crumb Cake 1.jpeg
My Banana Crumb Cake 


The recipe that I want to share with you is one of my absolute best for making use of over ripe bananas. Besides being light and staying moist far longer than any banana bread, this cake is hardly any work!  This is one of those recipes where you just basically throw ingredients together and uses oil instead of creaming butter with the sugar.

Furthermore, it just uses one cup of sugar and has a wonderful crumb topping with tasty nuggets of butter, cinnamon and another one-third cup of brown sugar.

The flavor of this simple cake is so complete that you honestly don’t need to add any vanilla extract in addition to the cinnamon!  

Do remember to level off your baking soda and baking powder.  You need to be exact because too much or too little can ruin your baking efforts.  

Once you try this recipe, I am sure that you are going to be so happy that you did.  In fact, tell me once you make it of what you think.


My Banana-Crumb Cake

Crumb Topping:

1/4 cup of flour
1/3 cup of brown sugar (light or dark)
2 tablespoons of butter or margarine (not spread)
1/4 teaspoon of ground cinnamon


Cake Batter:

1-1/3 cups mashed, ripe bananas (3 large or 4 medium size)
1 tablespoon lemon juice
½ teaspoon ground cinnamon
2 cups of flour
1 teaspoon of baking powder, leveled
½ teaspoon of baking soda, leveled
½ cup of canola oil
3/4 cup of brown sugar (light or dark)
1/4 cup sugar
2 large eggs


To Prepare the Crumb Topping:

Rub the topping ingredients together in a mixing bowl as you would for pastry.  Set aside.

To Make the Cake Batter:

In another mixing bowl, mash the bananas with a fork and then add the lemon juice, sugars, eggs, oil, cinnamon and beat with your electric mixture to incorporate.  

Sift the flour with your baking powder and baking soda.  Slowly add some to your banana mixture and beat through adding more flour mix until everything is combined.

Grease a 12 -3/4" x 9" x 2" baking pan and pour your batter.  Top with the crumb mix.

Bake in a 350-degree oven for about 25 minutes or until a cake tester, toothpick or slender knife inserted comes out clean.  

ENJOY!

Banana Crumb Cake piece 2.jpeg
You'll love how light and well this Banana Crumb Cake keeps.  Seriously, it does stay more moist than can imagine.

Sunday, April 12, 2015

Recipe: My Peanut Butter-Spice Layer Cake Is a Sweet Temptation You Won’t Be Able to Resist!


If you like a great simple cake, prepare to get excited.  Today I have the most exotic and delicious peanut butter cake with cloves and cinnamon that you will ever taste that is also easy to make.  Something else to cheer about is my recipe doesn’t call for fancy cake flour and uses plain, all-purpose flour, yet turns out fine-textured and light as a feather.  Top this cake with a fluffy whipped cream type of vanilla icing such as my special occasion bakery frosting and you increase your pleasure factor beyond belief!


My Peanut Butter-Spice Layer Cake, unfrosted.jpeg
This is  what one layer of my Peanut-Butter Spice Layer Cake looks like unfrosted.  


Instead of butter, you can use shortening or margarine as long as it is not labeled spread. Spread has too much water and will work for baking or in the above cooked bakery frosting. The recipe is linked below for you.  

Enough of my rattling on, here is the recipe!  


My Peanut-Butter Spice Layer Cake

2 cups sifted flour
3 teaspoons of baking powder, leveled
½ teaspoon of salt
½ teaspoon of ground cloves
½ teaspoon of ground cinnamon
1 tablespoon of vanilla
½ cup of creamy peanut butter
½ cup or 1 stick of butter or margarine
1-1/2 cups brown sugar, firmly packed (light or dark)
2 large eggs
1 cup of milk

Cream the butter, peanut butter, and sugar thoroughly before beating in the eggs, one at a time.

Sift the flour twice before adding the rest of the dry ingredients of sugar, baking powder, salt, spices in a separate mixing bowl.

Measure out your cup of milk and vanilla next.

Now gradually add some of the flour mixture to the creamed mixture and beat with your electric mixture. Alternate with milk, then continue to add more of the flour mix, beating through until everything is incorporated into your cake batter.

You will need to well grease  two  8"-5/8" x 1 ½“ layer cake pans.  I like to cut out two pieces of wax paper to fit the bottom of each pan.  This makes removing that cake without it coming apart so much easier.

Bake in a 350-degree oven for about 25-30 minutes, depending on how your oven is regulated.  Test with a cake tester, tooth pick or a slender knife to see if anything sticks.

Leave in the pans for at about 10 minutes before attempting to remove.  

Frost with my Special Occasion Bakery Frosting or your favorite frosting.

ENJOY! 

Saturday, May 17, 2014

Recipe: My Petite Coconut Layer Cake Couldn’t Be Easier Or More Delectable

delectable-Petite-Coconut-Layer-Cake.jpeg
My Petite Coconut Layer Cake 


Today, I wanted to share my delicious, little coconut cake recipe.  I love so many things about this particular recipe that is overwhelming with its decadent coconut.  Where do I start? It’s simple, incredibly moist, and quick to make for one. The fact that you can use oil and save yourself the hassle of creaming is another reason.  What else that is so incredible about this recipe is that its uses only one cup of sugar!

Yet, the fact this makes a smaller cake because there’s less batter to build up each layer’s height like a typical layer cake, excites me as well when it comes to controlling one’s urge to overindulge when near this tasty temptation.  Shorter layers also means it does cool quicker than normal layers, which makes for speeding up frosting time.

You can also use margarine, butter, or shortening in place of the oil.  This will require slightly more work creaming, but the texture of the crumb will be finer than with oil.  I usually stick with the lazy’s girl way with oil because it doesn’t improve the flavor–only the appearance.

Frost with your favorite icing and you can have this cake ready before you know it.  I do hope you try it because if you are a fan of the coconut, then this is the perfect recipe for you.

My Petite Coconut Layer Cake

1-1/2 cups of flour
2 teaspoons of baking powder
½ teaspoon of salt
½ cup of canola or corn oil
1 cup of sugar
2 eggs
2/3 cup of milk
2 teaspoons of vanilla
2/3 cup of coconut

Sift all the dry ingredients together in your mixing bowl.

Add the wet ingredients next and beat with an electric mixer to combine.  You can also use a whisk.

Stir in the coconut last to mix through.

Pour into two greased and floured eight-inch layer pans.

Bake in a 350-degree oven for about 25-30 minutes, depending on how your oven is regulated.  

Test with a toothpick, slender knife, or cake tester to see if anything sticks telling if it is done.

Cool and then frost.

ENJOY!

Tuesday, December 24, 2013

My Favorite Christmas Pound Cake Is Joy From the Oven!


Today I want to share a very special holiday treat with this pound cake.  My Favorite Christmas Pound Cake is moist with a fine crumb texture and is delectable with more extract flavorings than I normally use in one recipe and sour cream.   What pumps up the flavor even more is apricot brandy, which adds that special touch of flavor-magic to this recipe.

I usually use a margarine (but never spread) when I need to cream the sugar when baking. However, this is one time I prefer using butter for this particular recipe.  You can use vegetable shortening or butter flavored shortening, but butter seems to bring a richer taste to this cake.

You don't need any frosting on my cake since it is delicious just as it is.  Nonetheless, if you usually like to frost your pound cake, a thin orange glaze is also quite good.

I hope you get a chance to try my recipe sometime over the holidays because I think you'll love it as much as I do.

My Favorite Christmas Pound Cake

3 cups of sugar
1 cup of butter or vegetable shortening
6 large eggs
3 cups of flour
1/4 teaspoon of baking soda, leveled
1/4 teaspoon of salt
1 cup of sour cream
1 tablespoon of orange extract
1/2 tablespoon of rum extract or rum
1/2 tablespoon of lemon extract
1/2 tablespoon of vanilla extract
1 teaspoon almond extract
1/2 cup apricot brandy

Sift the flour with the baking soda and salt in a mixing bowl.

In another mixing bowl, cream the sugar with the butter with your electric mixer thoroughly.

Add eggs, one at a time, beating each to mix well into the batter.

Add the sour cream, all the extracts, and the brandy next and beat through to combine.

Pour into a greased and floured tube pan.

Bake in a 325-degree oven for about one to one hour and fifteen minutes, depending on how your oven is regulated.  Test to see if done with a cake tester to see if anything sticks.

ENJOY!

Saturday, August 17, 2013

My Simply Marvelous Saturday Pound Cake Will Make Any Day Feel Like a Holiday!

The recipe that I want to share with you today is one of our favorites and is requested quite often for my Saturday baking.  This is a delicious brown sugar pound cake made even better with thanks to pecans throughout to give it texture as well as some added nutty flavor.  You can use walnuts in a pinch, but I think the pecans bring more to it.

Another thing that I love about this cake is how easy it is to prepare!  With that said, I hope you will be tempted to try my recipe because it is very good.

Simply Marvelous Saturday Pound Cake

2-1/4 cups firmly packed brown sugar (light or dark)
3 cups of sifted flour
1/2 cup of sugar
1 cup of milk
1-1/2 cups of shortening
1 teaspoon of baking powder, leveled
1/2 teaspoon of salt + dash (about 1/8 teaspoon to later add to your egg whites)
1-1/2 teaspoons of vanilla extract
1 cup chopped pecans
5 large eggs
1/4 teaspoon of ground nutmeg

Take out your eggs and leave at room temperature so they will be easier to separate. 

Cream the sugar with the shortening.  Once those eggs had enough time to warm a bit at room temperature, you will add the eggs to the creamed sugar-shortening in your mixing bowl. 

In a separate mixing bowl, you will add your egg whites.   You will need your electric mixer to beat this with a dash of salt to make them stiff.

Next, you will be alternating wet  ingredients (milk and vanilla) with the dry (flour, baking powder, salt, nutmeg)  to that creamed sugar-shortening mixture until everything is mixed through.

Fold in those beaten egg whites and add in those chopped pecans to your batter.

Pour into a well-greased tube or bundt cake pan.

Bake in a 325-degree oven for about 1-1/2 hours or until a cake tester or a slender knife inserted comes out clean.

Do not attempt to remove this immediately from your once it comes out of your oven.  Allow it to cool in the pan for at least five or eight minutes so it doesn't break into pieces.

ENJOY!


Saturday, May 26, 2012

My Spice Cake Recipe Will Drive You Crazy With Pleasure!

piece of Spice Cake Supreme.jpeg
My Spice Cake Supreme is bursting with flavor!


Today, I have a great cake recipe to share with you.  This is a wonderful homemade spice cake that can be made into a layer cake or sheet cake.  Without any special fancy ingredients like cake flour, this delicious recipe turns out a light and moist cake comparable to any commercial mix.

This recipe calls for sour milk or buttermilk.  If you don't have any on hand, do not fret, dear readers.  Measure out your cup of milk and return two tablespoons.  Instead measure out two tablespoons of lemon juice and add to the measured milk.  The lemon juice curdles that sweet milk and works nicely in this recipe.

Frost with your favorite white vanilla or cream cheese icing and you will really enjoy this simple cake!

My Spice Cake Supreme
plain spice cake supreme.jpeg
This cake is moist and delicious.

2 tablespoons of molasses (dark or light)
2 cups of light brown sugar (firmly packed)
1/2 cup margarine (not spread) or vegetable shortening
2 eggs
2 cups of flour
2 teaspoons of ground cinnamon
1/2 teaspoon of ground nutmeg
1/2 teaspoon of ground cloves
1/2 teaspoon of baking soda
1 cup of sour milk or buttermilk 

Beat the sugar and  the margarine with your electric mixer until well creamed.

Add the eggs, one at a time, beating well after each one.

Sift together all the dry ingredients and keep in a separate mixing bowl.

Alternate small amounts of the dry ingredients along with the sour milk, beating well after each addition.  Try to end with the milk as your last ingredient to keep your cake extra moist.

Grease two-9 inch layer cake pans or a 9" x 13" sheet cake pan. 

Bake at 350 degrees for about 40 minutes for the sheet cake or 25-30 minutes for the layer cake.  Test with a toothpick to see if it is done.


Tuesday, January 11, 2011

Recipe: Try My No Work, Eggless Yellow Sheet Cake!

piece-of-eggless-yellow-sheet-cake.jpeg
This sheet cake is delicious and great for anyone with an egg allergy.


Cooking or baking for anyone with food allergies can be tricky enough.  Sometimes, you give up on the ingredient known to trigger the allergy or try substitutions, which may or may not work to your satisfaction.  Lately, I have been experimenting with ways to avoid eggs when baking cakes. A recent effort proved delicious and simple with the yellow sheet cake I'm about to share. 

This recipe will produce a cake more on the order of a pound cake with a denser grain than a light cake like a typical one of a layer cake.  Still, this cake is about the easiest one you can whip up since it involves no creaming of butter or margarine.  All you need is your electric mixer to blend all the ingredients and then bake into a nice sheet cake for when the urge for cake calls.

eggless-sheet-cake.jpeg
This is an easy yellow sheet cake.


No Work Eggless Yellow Sheet Cake


3 cups flour
2-1/4 cups sugar
3/4 cup canola oil
1 teaspoon salt
1-1/2 tablespoons baking powder
4 tablespoons cornstarch
1-1/2 teaspoons vanilla

Sift all the dry ingredients together, then the wet.  Pour into your small greased sheet cake pan (about 11-1/2" x 8-1/2") and bake at 375 degrees for approximately 30 minutes or until a toothpick inserted comes out clean.  Frost with your favorite frosting or try mine.


Lemon Frosting


2-1/2 cups powdered sugar
3 tablespoons milk
3 tablespoons margarine
1/4 teaspoon lemon extract

Mix everything and beat with your electric mixer until creamy and ready to spread.