Showing posts with label homemade skin care recipes. Show all posts

Tuesday, February 13, 2018

How to Strengthen and Get Healthier Nails During Winter

unpolished-nails.jpeg
Gentle buff your nails first before treating them to this soak.


Besides all the headaches associated with winter, there is another thing to have against this season.  Not only does it dry out the skin more and add static electricity to our hair, it also does a number on nails as far as brittleness is concerned.  Therefore, it’s important to pay extra attention to lubricating your hands and nails often with hand creams and lotions as well as trying this DIY Moisturizing Nail Soak every chance you get.

There are not many ingredients involved or time wasted to benefit from what this winter nail fix can do.  What’s great about this recipe is that it whitens nails somewhat as it returns ample lubrication to dry nails with its simple mix of lemon juice, extra virgin olive oil, vitamin E 400 I.U. capsule, and lavender essential oil. 

You don’t want to wear any nail polish before you do this.  Allow your nails to breathe every now and then because never giving them a break from nail enamels further contribute to this problem.   

I like to do this soak when I’m watching some television before bedtime.  Before I pop my nails in this aromatic lavender nail soak, I make it a point to gently exfoliate with my nail buffer to smooth any ridges.  You don’t have to use a file like this, but I found it helps the soak penetrate better.

By the time you wake up in the morning, your nails will appear healthier and a bit stronger than before.  

DIY Moisturizing Nail Soak

1 teaspoon of lemon juice
1 vitamin E 400 I.U. capsule, pierced
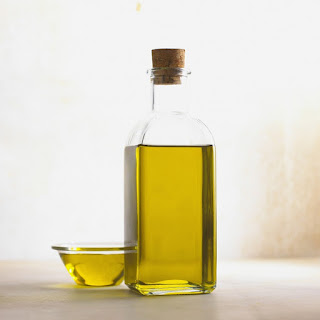
2 tablespoons of extra virgin olive oil
3 drops of lavender essential oil

Mix all the ingredients in a small container that you can soak your nails in comfortably.

Keep your nails in this soak for at least 7-10 minutes.  You won’t be rinsing this mixture off.  Instead, you will be slipping your hands into a pair of cotton gloves for continuing the treatment while you sleep.

Try my recipe and your nails will be grateful!

Sunday, February 4, 2018

My DIY Lip Scrub Is a Sweet Fix for Dry, Flaky Winter Lips That Also Heals and Conditions

two-sets-of-mouths.jpeg
Your lips won't suffer or be rough againe once you try my DIY lip scrub recipe.


At this time of year, you’re probably slathering on plenty of lip balm to relieve dry, winter lips.  Besides the uncomfortable feel, dry lips also leave them with a rougher than you hardly want.  Therefore, exfoliation is a must to smooth that flaky skin and condition with some healing lubrication like this easy homemade lip scrub that takes only minutes to help end that problem.

All you need are few basics from your kitchen that you won’t have to run out to buy. Sugar is what I use to exfoliate due to the texture of its crystals. 

Honey is the healing humectant to treat any of the fine cracks that can happen when the lips are chapped  and helping lock in natural moisture.  

To make it tastier, I found measuring out just a little vanilla extract even better to improve upon the flavor.  If you're not a fan of vanilla, you can substitute another extract with your favorite flavor. 

Finally, I add some pure extra virgin olive oil as the lubricant to condition and protect with all its beneficial vitamin A and E antioxidants.  Another reason I depend on the purest form of olive oil for this DIY recipe is because the extra virgin variety has antibacterial properties to disinfect due to the mix of its polyphenols (oleuropein, tyrosol, and hydroxytyrosol).

My DIY Lip Scrub 

1 tablespoon of sugar
1/4 teaspoon of vanilla extract
½ teaspoons of honey
½ teaspoons of extra virgin olive oil

Mix all the above ingredients together in your bowl or container.

Apply to your freshly washed lips and massage gently in a small, circular fashion as you work.  Keep working the scrub in for about a minute or two

Wipe off with a paper towel, tissue or a wash cloth.

Your lips will thank you for it and feel soothed along with a new, velvet-like smoothness and the ideal surface for your lipsticks and glosses.

Wednesday, January 31, 2018

DIY Foot Care Soothe and Smooth Aromatherapy Scrub Recipe


bare-feet.jpeg
Your feet will feel and look renewed.
We put our feet through a lot of abuse every day. Between standing on them for too long or walking too much to wedge them in stylish, but hardly the most comfortable shoes, we in return pay the price for it.  Since I also suffer, you probably notice how many posts I devote to restoring the health and beauty of feet with DIY foot care recipes.   Today, I want to share another multitasking one to relieve stress as well as  healing any fungal infections of the nail, disinfect with its antiseptic properties while smoothing, and softening tough skin.  


My recipe has sweet almond oil to serve as the carrier oil.  It also helps relieve aches, improve circulation and rid the skin of toxins.  
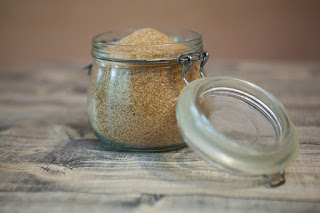
brown-sugar.jpeg
Brown sugar has a finer granule without roughing up hurting feet.

Brown sugar was selected as the exfoliant.  Having a finer texture than crystal structure of regular sugar, it is not as abrasive for hurting or swollen feet.

The other ingredients include tea tree oil for being an antiseptic as well as fungicide to help heal any problems of the nails and skin. 

Something else that is beneficial for the health of the feet is rosewood essential oil.  I chose to add this since it is an antibacterial, antiseptic and can boost your mood. To further aid in stress-busting, I also used some lavender essential oil. 

Finally, I chose to incorporate a tablespoon of honey to this DIY recipe.  Honey is a humectant that can draw moisture to the skin besides help with inflammation and fighting bacteria.

DIY Foot Care Soothe and Smooth Aromatherapy Scrub

one cup of brown sugar (any variety)
one-fourth cup of sweet almond oil
four drops of tea tree oil
two drops of rosewood essential oil
four drops of lavender essential oil
one  tablespoon of honey


Mix the ingredients in a container until well combined.

Apply to your clean feet and gently rub the mixture to exfoliate and treat the skin.

You’ll benefit from its aromatherapy through this treatment as you work, feeling more relaxed the longer you spend inhaling and rubbing.  

By the time you finish using your ingredients, wash your feet and pat dry.

Your feet will feel pampered with new softness, smoothness, and energized.  

Friday, January 26, 2018

Pamper Your Skin and Hair With This DIY Restorative Egg Mask


eggs-in-bowl.jpeg
Egg yolks are only one of the ingredients that can help your skin and hair stand out.


If you want to help your complexion and hair thrive, this DIY Restorative Beauty Egg Mask works for strengthening, adding shine, protecting, and healing damage for overall skin and hair renewal.

Eggs are not only a delicious source of protein for the body but full of beauty benefits. For years, women have turned to them to enhance their beauty through various skin and hair treatments due to their helpful components such as protective antioxidants vitamins A , D, lutein, and zeaxanthin for the skin’s elasticity to its protein keratin for restoring the luster of damaged hair and skin.
almond-oil.jpeg
Use sweet almond oil.  The colors range from pale yellow to golden.

Almond oil is another ingredient in this recipe for its rich bounty of vitamin E and monounsaturated fatty acids, proteins and minerals. This is a fast absorbing oil that can deep cleanse pores and follicles to purge them of debris.

Be sure that you use the sweet almond oil made from edible almonds.  The other is the bitter variety used for medicinal purposes and can be dangerous.  

Rose essential oil is the last ingredient.  With its wealth of vitamins, minerals and antioxidants, this oil provides excellent moisturize, calming and antiseptic powers with just three drops when used in this recipe.

What I do first is apply this egg mask to my freshly washed face before using the rest on my hair. This is enough for my length of hair.  But if you don’t have enough, then simply crack another egg and add the yolk to your bowl of ingredients.  You can also add an additional tablespoon of the sweet almond oil.


DIY Restorative Beauty Egg Mask for Skin and Hair

two eggs yolks
one tablespoon of sweet almond oil
three drops of rose essential oil

Beat the egg yolks until frothy before adding the sweet almond oil and rose essential oil.

Apply to your freshly washed face and leave on for about fifteen minutes before rinsing off. 
Close the pores with cool, not cold water.

Your complexion will be will look fresher, healthier and positively glowing.

To Use on the Hair:

Make sure that your hair is slightly damp (not freshly washed) because the mixture will cling better. 

Adjust the recipe if you need to, then apply to your head and leave on about twenty-five minutes or longer. 

Wrap your treated hair with some plastic wrap and cover with a towel turban.

When your time is up, shampoo your hair and style as usual.

Your hair will be shinier, softer and more manageable.

Monday, January 8, 2018

A Quick DIY Beauty Fix to Reduce Eye Puffiness That Works

green-eye.jpeg
You won't believe how fast this DIY puffy eye fix works until you try it also!


Eye puffiness is a common complaint that many of us have. If you are a regular reader, then you know that I have dedicated quite a few posts to this problem already.  However, I have tried one of the speediest ways to reduce the swelling with this simple DIY beauty fix that I couldn't wait to share it with you.

You won’t need anything fancy or distilled water to make this because once you use it, this treatment will be disposed of.  All you’ll need are two ingredients with table salt and plain tap water.  

What you do is measure of ½ cups of hot water.   The water temperature should be hotter than warm, but not overly so that you might scald yourself when using it beneath the eyes in a compress.  Keep this in mind.

To that hot water, add 1/4 teaspoon of table salt.  

salt-shaker.jpeg
Table salt is the star ingredient.
Now, you will need cotton pads to immerse in your salt water mixture.  Squeeze out the excess so nothing has a chance to reach your eyes.  Then stretch out for a few minutes (about five minutes or so) on your bed while the salt water has a chance to drain the build up fluids.

The swelling goes down quite quickly.  Usually, I’ve been getting mine down in less than five minutes.  If your puffiness is really bad, just go back to the salt water and wet your compress and reapply for another five minutes.

Honestly, this is one of the best and fastest methods of getting rid of eye puffiness that I ever used. It also is less messy of a method compared to some others that I tried. Try it yourself and I promise that you’ll be just as thrilled with how this DIY beauty tip works! 

If you’re interested in learning about the other tricks that I’ve tried to get rid of puffy eyes or lessening your chances of waking up with puffy eyes check out those earlier posts as well as sure bet relief from puffy eyes and natural fixes for puffy eyes.

Saturday, January 6, 2018

Try My DIY Charcoal Mask for the Ultimate Deep Clean


charcoal-powder.jpeg
Charcoal acts like a magnet for how it pulls toxins from deep within the pores.


For those times when I am wearing a lot of heavier makeup, I find a charcoal mask is exceptional for purging the pores of any traces of grime or impurities that my makeup remover may have left behind with how deeply it can clean.  My complexion feels tingly clean once I finish with how the charcoal manages to pull out the toxins for the freshest skin possible.  

Any skin type can benefit from this DIY charcoal mask.  To counteract the drying effect of the charcoal for someone like myself with dry skin, I added a little honey for help with moisturizing since it is a natural humectant as well as serving an anti-bacterial ingredient.  I also added castor oil to further power this mask due to it ricinoleic acid that helps fight bacteria, unclog the pores and defend against irritation.

I never thought much about the type of water when experimenting with any homemade skin care recipes because usually I didn’t have much to save or kept it that long.  However, the more that I thought about it, the more I decided it might be better to make a change.  Now I have been using distilled water or boiled water as a precaution to limit any possible contamination just in case of any left over product.


My DIY Charcoal Mask

2 teaspoons of powdered activated charcoal
2 teaspoons of distilled water or cooled, boiled water
2 drops of tea tree oil
½ teaspoons of honey
½ teaspoons of castor oil

Stir the charcoal and water first in a small bowl until mixed.  

Add the tea tree oil, the honey and castor oil next and mix with the charcoal mixture to form a smooth paste.

Apply this mask to your freshly washed face and leave on for about 9-12 minutes before rinsing off with warm water. 

Close the pores with cool, not cold water.

Sunday, December 31, 2017

DIY Beauty: Try My Cocoa Anti-Aging Mask to Clear and Renew Your Complexion

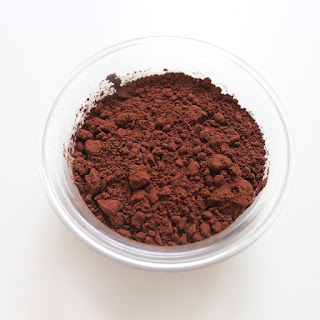
cocoa-powder.jpeg
Your kitchen is loaded with beauty ingredients such as cocoa powder.


I love experimenting with ingredients in my kitchen for beauty purposes, especially when they sometimes can outperform their commercial counterparts. My cocoa anti-aging mask recipe that I have for you today is truly a winning one for its complexion benefits to clear and renew aging skin.

For one, cocoa is full of antioxidants that help the body internally as well as externally due to its flavonoids for protecting the complexion from free radical damage and aiding the skin's density.  

Another ingredient in this recipe is honey.  With its antibacterial and anti-inflammatory properties, it can heal and calm  while also holding in the skin’s natural moisture being a humectant as well.

Sour cream is also what you’ll notice that I put in here for its lactic acid, a natural alpha hydroxy acid, for doing its part in gentle exfoliating and stimulating new cells to emerge.  You also can substitute with plain yoghurt, if you care to.

I also turned to oatmeal because it also has wonderful antioxidants and anti-inflammatory properties.

Finally, I used a bit of a ripe avocado for its rich storehouse of fatty acids, antioxidants and minerals.

I hope the next time that you’re in the mood to indulge your complexion that you’ll try this mask because it erases dullness and brings out a remarkable glow.


DIY Cocoa Anti-Aging Beauty Mask


1/3 cup of unsweetened cocoa powder (the darker the powder the better)
1/4 cup of honey
2 tablespoons of sour cream or plain yoghurt
2 teaspoons of finely ground oatmeal
1 tablespoon of mashed avocado


You will need to take out your food processor or blender to grind the raw oatmeal into a fine powder.

Once done, measure the rest of the ingredients into a bowl or container along with the oats and mix together.  

Apply to your clean face and relax in private.  You will want to be alone because your family will mock your face.

Give the mask about 15 minutes before rinsing with lukewarm water.

Close the pores with tepid water, then dry.


Friday, December 15, 2017

DIY Bath Salts Make Thoughtful Small Gifts for Co-Workers or When Visiting Friends Over the Holidays


rose-bath-salts.jpeg
You can add a drop of food coloring to dress your homemade gift up.


What I enjoy doing is baking a variety of different cookies to take with me when visiting friends or giving co-workers.  I still like to do that but I also like to bring another tiny gift with me to share with this homemade bath salts recipe that I love for what it does to relieve tired muscles. 

Though you can buy similar bath salts, I like that I can whip this homemade soak up in small batches to keep the essential oil as potent as possible.  It also is very cost effective compared to some commercial products of the same quality.  Another plus of making DIY bath salts is that you can vary the essential oils that you use to suit your needs.  

What I like to do is collect glass candy jars or a more ornate jar that locks for this purpose to present the salts in.  You buy them easily enough at local stores or find beautiful and unique ones at your local flea market for pennies.  

ornate-glass-jars.jpeg
Fill your bath salts in whatever pretty jar that catches your eye.

I have spent a lot of time soaking in my tub benefitting from this recipe and the magic of what its simple ingredients can do when your body feels tense or sore.  Of course, I don’t hope that you need to use this recipe for any ailment, but it is my favorite winter soak.  My family and friends that have tried it agree, if that means anything.

DIY Versatile Bath Salts 


3/4 cup of Epsom salt
1 cup of coarse sea salt
3 tablespoons of baking soda
3 drops of lavender essential oil or rose 


Mix the Epsom salt, coarse sea salt, baking soda and either the lavender essential oil or the rose essential oil. If you desire to make them look more commercial, add a drop of appropriate food coloring. 

Pour the salt mix into a clean jar.

Secure the locked jar in a gift box or just with a ribbon and bow.

Happy Holidays!

Friday, October 20, 2017

A Gentle Natural DIY Facial Exfoliator That Sensitive Complexions Need to Try

oil.jpeg
Your kitchen is a handy place to turn when it comes to skin care.

All the makeup that we regularly apply does leave minuscule traces behind.  Though we do our best to remove our products, our facial cleansers and toners can only do so much unless we make it a point to exfoliate.  Of course, you can buy exfoliating products as scrubs to facial peel pads, etc. to deep clean the pores and resurface the complexion.  However, your kitchen is also another alternative with plenty of ingredients that can help such as this wonderful DIY facial exfoliator recipe for sensitive skin.

This one uses brown sugar, which has a finer grain than table sugar that could be a bit more irritating.  I also like to use sesame oil in this recipe to help with the glide but also for the benefit its rich fatty acids have for skin from antibacterial to anti-inflammatory properties.  

This recipe is so simple.  Mix one tablespoon of brown sugar to one half teaspoon of sesame oil before applying to your freshly washed face.  You do want to work quickly when using this oil since it can absorb somewhat compared to one like olive oil. Using olive oil is fine with my dry skin, but I like the feel of less grease against my face that the sesame oil provides as well as the way it disinfects.

Another gentle DIY exfoliator is the one I shared using baking soda with some of your facial cleanser that you might want to check out.  This one does a nice job without causing any redness.

Exfoliation is a must especially with all these new chemical ingredients that continue to appear in our makeup and skin care products that could be accumulating deep within the skin.  Allowing those ingredients to remain could eventually take a toll on your beautiful complexion if you don’t take your skin care seriously.  Therefore, take a few extra minutes once a week or every other week to help your skin recover through exfoliation to keep beautiful!  

Saturday, October 14, 2017

Have You Tried Raw Honey to Heal a Blemish?

honey-drizzled-on-spoon.jpeg
Be sure to use raw honey, which is more effective since it was not treated with heat or processed to alter it.

Did you know that raw honey can help with pimples?  It is a natural antibacterial that also has anti-inflammatory properties.  Together, they reduce the swelling and redness and are kinder to the skin unless the harsher drying effects of salicylic acid products.

Once you cleanse your face, you dab just a little over the pimple before covering with a bandage.  You repeat this process for a long as you need to.  

I tried this last week for a few days and it worked without any skin irritation.  

Sunday, September 3, 2017

Perk Up the Feel and Look of Your Feet With My DIY Refreshing Peppermint Salt Scrub


bottom of feet.jpeg
Pamper your feet and they will carry you further. 


You might have noticed that I devote quite a few posts to help improve feet for appearance as well as helping them to feel better. Depending on what ingredients I currently have on hand is usually the recipe that I’ll treat my feet to with at the time. Today, I have another with my Refreshing Peppermint Salt Scrub recipe that you might want to try that not only stimulates circulation, exfoliates roughness and offers a bit of cooling as it works. 

Taking time to pamper your feet will make them more beautiful, but it also perks them up a bit.  

More beneficial DIY homemade skin care recipes to beautify and help the well-being of your feet are at your disposal in my sidebar.


two people with bare feet.jpeg
You will love how refreshed and softer your feet will feel.

My Refreshing Peppermint Salt Scrub

1-3/4 cups of sea salt
1/4 cup of jojoba oil
½ cups of sweet almond oil
10 drops of peppermint essential oil

Mix the ingredients together and massage your clean feet.  The action will remove that hard, dry skin and leave it much smoother. Those feet will also be better moisturized.   

Friday, July 14, 2017

Why Older Complexions Need Exfoliation Even More Than Younger Ones!

beautiful woman with closed eyes.jpeg
Starting exfoliation earlier on, this beauty knows will keep her skin looking younger longer.


If you are a regular reader than you know how strongly I feel about the importance of exfoliation to improve a complexion.  After all, it is the only true way to clear out old cells and the last traces of makeup and grime that may still be lingering deep below the skin’s surface that could be dulling its natural luster.  At the same time, it is also the best anti-aging trick that you can do because once those old cells are loosened and begin to lift, the process activates other cells called fibroblasts to action to form collagen and hyaluronic acid to plump the wrinkles and add suppleness. 


Naturally Shedding Skin Cells Slows Down the More We Age


No doubt, you’re probably aware of what I’m saying.  Yet, what you may not know is the older you get, the longer those cells remain to cloud complexions.  Think of it this way. Young skin has an easier time shedding skin cells at a rate of every 20 days on average.  Now compare that to older skin where this natural process greatly slows down and can take twice or three times as long for them to fall off!

Regardless of age, you don’t want to get overzealous with exfoliation, which you may accidentally do once you start noticing how beautiful your complexion becomes resurfacing.  The pores magically shrink, texture improves, skin brightens, and you’ll wait with bated breath as marks from acne, pimples to a small scar gradually start fading away.

Too Aggressive Exfoliation Can Hinder Skin Renewal 


If you use a device like your Clarisonic and find the temptation of using the brush with its rotating heads set on the firmest setting more than once a day, then you’re not helping your skin.  Instead, you could be aggravating developing cells and risk damaging the complexion with your enthusiasm.  To be on the safe side, only use that brush once a day on the lowest setting instead and watch how much better your skin will respond.

You may also want to try a facial peel.  Be careful of too strong or frequent use of such a product or expect raw, red skin and possibly injuring your complexion.  Glycolic acid products or a mix of other alpha hydroxy acids  for at home typically are between 5 percent for the mildest peel to 15 for a more intense treatment.  

My favorite happens to be a facial peeling pad. They are convenient and loaded with just what you need for beautifying.  Some companies insist that facial peel pads can be used daily without any harm to your skin.  I, however, do believe this is more beneficial to the company’s profits than overly stressing the skin.  Once or twice a week is all I subject my skin to. 

Texture of the Exfoliant Matters Even More for Delicate, Older Skin


Scrubs and masks also help exfoliate dead skin cells.  However, be careful of the type of granules or the texture so not to rip up the skin.  Check my sidebar for DIY formulas under the homemade skin care recipes label for others like this excellent scrub.  

Of all the expensive anti-aging products that you can buy, there is nothing better than can erase years off of your face than exfoliation.  You may not believe as adamantly as I do about the value of exfoliation, but I swear by it.  It comes first to help make those costly products actually penetrate deeper into the pores. Otherwise, the product just sits there unable to work its magic for you.

What I’m sharing is what I personally do.  I may only be an average looking woman; but trust me, I do have beautiful skin–-and so can you!  Follow my lead and you might not even need to wear primer under your foundation and still have great results by the perfect surface you’ll create.  Honestly, what I am saying is true.

Sunday, July 9, 2017

Sunburn? Try This DIY Strawberry Sunburn Relief Available From Your Kitchen Pharmacy!

strawberry.jpeg
Sunburn hurts. Strawberries are one way to rid you of the sting plus more DIY help!


Sunburn can sneak up on you when you’re having a good time or fall asleep in the sun without proper protection.  Sometimes, you might not even think it is that bad until later when you get home and bathe, only to feel it flame up on your skin. Hopefully, this won’t happen to you this year, but just in case your kitchen can be your own pharmacy because relief can be within your refrigerator.

I shared a few other DIY sunburn soothers before that help ease the pain.  One sunburn fix was with dry powdered milk and some honey that did exceptionally well for cooling, preventing infection and even help accelerate healing that you might want to check.  The second sunburn fix is another wonderful milk-based one due to its fat and proteins that also uses tomato juice.  Remember to keep the water cool just like the milk also helps lower the skin’s hot feeling.  

You may wonder why switch from a DIY remedy that helped in favor of another.  The answer is because I had to improvise on what was in the refrigerator and pantry at the time the problem occurred, which you might have to do as well.

This is why I have yet a third DIY strawberry sunburn soother remedy for you today.  Strawberries are on sale a lot now being in season.  You probably have a package in your refrigerator if you’re as fond of those berries as we are.  Anyway, strawberries with their tannic acid and the probiotics in plain yogurt make an awesome combination when your skin is on fire.  

All you need to do is to take about six large strawberries (about 1-1/2 cups) to ½ cups of plain yogurt.  I did not use anything fancy like Greek style, just the ordinary plain yogurt that I use for my sauces and salads. Clean and mash the berries first before combining.  Then slather it over the burned areas.  Keep this mixture on about twenty before rinsing off.  By the time you do, you will notice how much better and even lighter the burn seems to get.

Depending on what you have on hand, all three of these sunburn relief DIY remedies are worth trying.  You just need to go with the one that you have the ingredients to prepare it with.  

Saturday, July 8, 2017

A DIY Reviver to Invigorate Tired Legs and Feet!

lower part of woman's body in skirt and heels.jpeg
Stylish pair of heels are great, but legs and feet can pay a price at the end of a day.

Running around on your feet all day can be agony by the time you return home. Aching muscles and burning feet are crying out for relief. Besides a long soothing bath or shower and immersing feet in a therapeutic soak, I have another suggestion to help revive them again with this DIY leg and foot remedy.

You don’t need to buy a lot of fancy ingredients to prepare this homemade lotion, which refreshes them amazingly well.  This lotion with peppermint essential oil has antiseptic and antimicrobial properties to further help.  

You will need to cook and then cool a batch before you can feel better.  Nonetheless, this is great to have on hand when this tired leg and foot problems happen, especially in the summer due to its cool sensation.


DIY Reviver for Tired Legs and Feet

½ cups of aloe vera gel
2 teaspoons of cornstarch, leveled
3 drops of peppermint oil
2 teaspoons of witch hazel
1 tablespoon of olive oil 


Mix all the ingredients except the peppermint oil together before placing in a pan to cook enough to thicken slightly.  You want a spreadable consistency.  Once that stage is reached, let this mixture cool before adding the peppermint essential oil.

Keep in a jar that can seal. A clean peanut butter jar works just fine for this purpose.

When you’re ready, start rubbing some over your legs and feet.  Soon you will notice a wonderful coolness set in to replace that tired feeling.

Thursday, May 4, 2017

How to Make Your Own Shimmering Body Lotion for An Inexpensive Sun-Kissed Glow!


Don’t you love when your skin gradually gains some color at this time of year to be ready for summer?   If so, I know a way that you can get that all over healthy glow while making use of the products you probably already have on hand with this simple DIY Shimmering Body Lotion that I want to share with you.

You wouldn’t believe how easy it is to adapt a basic body lotion and transform it.  All else that you need is some shimmery liquid or cream bronzer that you can squeeze or drop a little into that lotion. Use just a tad of the bronzer at first because you can always adjust once you experiment with the right combination for your skin tone. 

The next thing that you do is recap and give that lotion and few brisk shakes.  Once you do, test the degree of the shimmer lotion on your arm.  You may want to repeat and add slightly more bronzer to further warm up that glow to your liking, if that sun-kissed look you created is too pale. 

I assure you that once you get your own formula for this shimmering body lotion figured out, then you will want to keep on concocting your own. 

Wednesday, April 12, 2017

My DIY Cleansing Scrub Recipe Wonderfully Exfoliates!


Exfoliation is very important if you want to get fresh skin cells to surface whether to your face or body.  The recipe that I’m about to share with you can be used on your face, provided you don’t use too much pressure in scrubbing. Remember, you want to be gentle with rubbing because cornmeal does have irregular edges that can slough off skin, but also cut it if you work it too hard or often.  However, your skin can benefit from these kitchen cleansing grains if you use a light hand.

Though you can use old-fashioned or quick oats straight from the container, I prefer to take out the food processor or blender and give the oats a whirl.  This makes a finer powder than the chunkier oats for this recipe.

I hope you give this scrub recipe of mine your own home test and see how nicely it works to improve your skin as it has helped mine.  

My DIY Cleansing Scrub

2 tablespoons of cornmeal 
2 tablespoons + 1 teaspoon of oatmeal
1 teaspoon of vitamin E oil
1 teaspoon of wheat germ oil

All I do is mix some together and it’s ready to use.  

Don’t try storing it because it won’t keep.  

Tuesday, February 28, 2017

Try My DIY Oil Reducing Toner If Excess Shine Is a Problem

woman's face with pimples.jpeg
This beauty is about to discover the amazing skin care benefits of ingredients from the kitchen.


Not so long ago, my complexion was oily.  For me, it was an endless battle trying to keep the shine away despite how hard or as many products that I tried without being overly harsh on my complexion. Desperation drove me to experimenting with natural beauty with ingredients from my kitchen and pantry.  This DIY Oil Reducing Toner is one that I thought I had shared, but apparently overlooked when I was searching through my old posts.

All you need to have on hand is a bottle of apple cider vinegar.  This is an excellent way to disinfect your face of bacteria, balance the pH level and control oil.  The recipe is simple.  What you do is mix two tablespoons of that vinegar to one-fourth cup of water. Wash your face first, then dip a cotton ball in this toner and swipe it over your face.  Leave this toner on for about 10-15 minutes.  Afterwards, rinse clean. 

Though you have many brands of apple cider vinegar to select from, you might want to consider an organic apple cider vinegar like Braggs.  This cloudier variety contains the “mother,” with more proteins, enzymes and friendly bacteria than the other varieties and seems to have more beauty power when it comes to skin.  

I hope that you give my DIY Oil Reducing Toner recipe a shot because I’ve been there and know how frustrating an oily complexion can be.  Try this and hopefully it will do for you what it did to cut the excessive oil from my skin.

Wednesday, December 14, 2016

Decrease Excessive Facial Redness and Shrink Pores With This DIY Toner!

cup of green tea.jpeg
You don't have to spend a lot for effective skin care.


I do not have excessive redness in my complexion, but my mother does.  However, a friend of hers shared this simple recipe to calm the skin down that does seem to make a difference helping with some of the redness while also shrinking pores.  Therefore, I wanted to share in case your skin could also benefit.

All you need is to brew up a strong cup of green tea.  Allow it to cool before you’ll take a few cotton balls or a cotton round and wipe over your face.  Store in your refrigerator and apply as needed.

This beauty trick may surprise you in how well it works to deal with this issue.  I know that it really shocked us because it seems to do more than some of the toners she was using.

Thursday, October 20, 2016

Your Feet Deserve My DIY Foot Sloughing Soak for Skin Pampering!

feet wearing snakeskin heels.jpeg
Hard-working, stylish feet need all the help they can get--like this soothing recipe!


We spend more time concentrating our beauty efforts on our faces and bodies than our often neglected feet. However, if you want to reward them with smoother skin, I hope that you will set aside some time to try this simple recipe because it encourages smoother feet as it very gently exfoliates rough skin.  

Another perk is how stimulating you will find this homemade foot treat is once you take advantage of this warm, soothing soak.  Your tired feet will thank you.

DIY Foot Sloughing Soak

1/3 cup of warm olive oil
juice of two fresh lemons
1 vitamin E soft gel capsule (400 I.U.)
2 drops of peppermint essential oil

Heat the olive oil until it is warm, but not hot so it is a comfortable temperature.

Pour this into your foot size basin along with the juice of two fresh lemon, the contents of the vitamin E capsule once you pricked it open with a pin and the two drops of peppermint essential oil.  

Soak your clean feet for as long as you can, but at least ten minutes before drying.  Follow up with foot cream.


Tuesday, August 23, 2016

If You Have Difficulty Falling Asleep, Try My DIY Sleep Spray!

sleeping woman with dog on sofa.jpeg
Hopefully now, this beauty will make it to bed for a more restful sleep.


Sometimes, it’s hard to fall asleep.  For those times, I turn to this wonderful recipe that helps induce sleep through aromatherapy and its relaxing blend of lavender and chamomile essential oils along with rosewater for doing the trick.  

This spray won’t magically make you sleep, but once you spray a little of its soothing aroma, it has a very calming effect.  Before you know it, you do feel more in the mood to drift off.